
Canning Venison: The Pressure is On
Around the end of October a few years ago, while planning dinner, I searched through my somewhat disorganized freezer and found, buried in the bottom, a plastic bag of freezer-burned venison. Disgusted, I carried the icy block to the trash. Not only had all that delicious meat gone to waste, but it also took up precious space in my tiny freezer since last deer season.
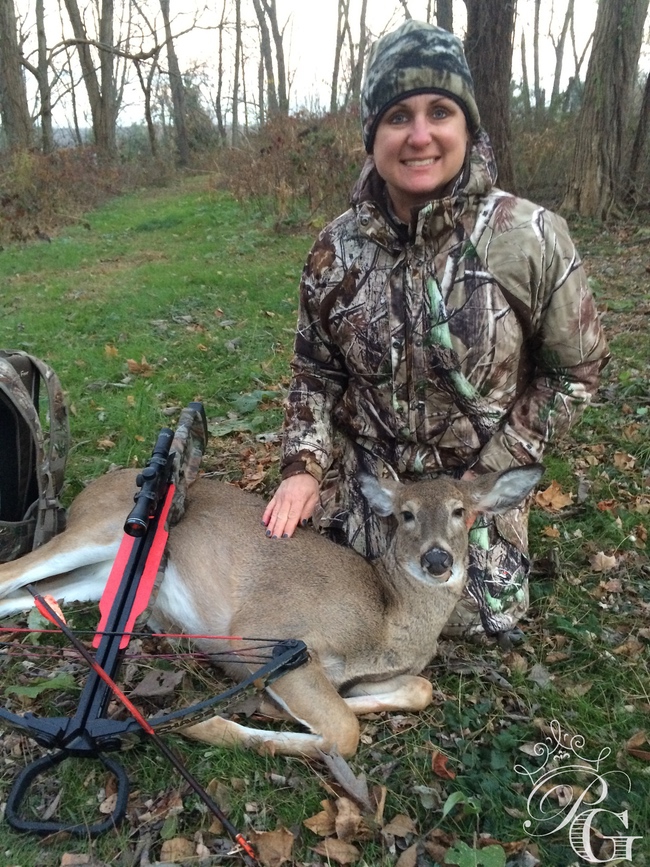
My first doe with a crossbow.
Luckily, I found a solution to the issue of failed venison storage of years past. A North Carolina friend of mine taught me the wonders of canning venison, using a pressure canner. The canning process was not a new thing to me. At a young age, I watched my mother and grandpa can tomatoes, peaches and apple sauce. Later, when I married and had a house and garden of my own, I carried on the tradition canning salsa and peppers every year using grandpa’s old Ball Blue Book of Canning with hot water baths. I never considered pressure canning. My mother always warned me of the horrors of pressure canners. “Grandma had a pressure canner blow up once in her kitchen. Food spewed everywhere. They are so dangerous,” she said. Against the wishes of my mother, I ordered a pressure canner and bought new jars, lids and bands. All I had to do was wait for the first harvest of the season.
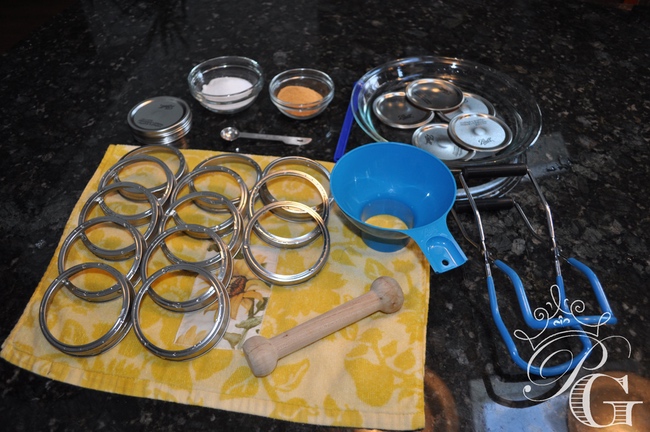
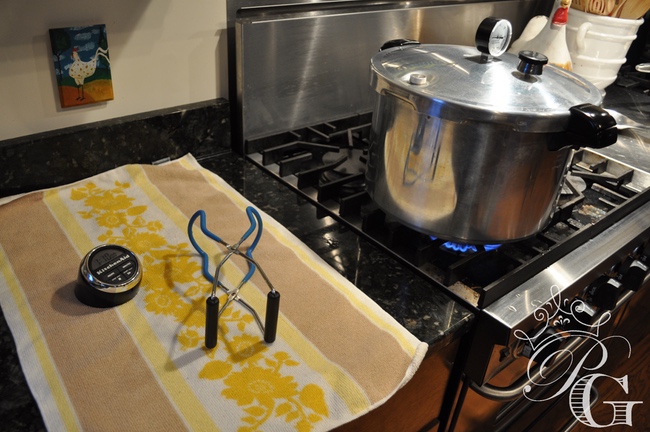
Pressure canning venison is truly an easy process so long as you diligently follow all the steps and don’t leave anything out. Read all of the instructions that came with your pressure canner before you begin. For those new to canning, you will also need to learn how to prepare the jars, bands and lids. I prepare my jars in the dishwasher, on the sterilize mode with nothing else inside. By keeping it closed until I am ready to use each jar, they remain hot, clean and out of the way. I place lids and bands in a bowl of hot water on the counter near my work area. Although mason jars and screw bands may be reused, I use new lids each time. Prepare the pressure canner by filling it with room temperature water up to the line noted in the manual and place it on a level cooking surface.
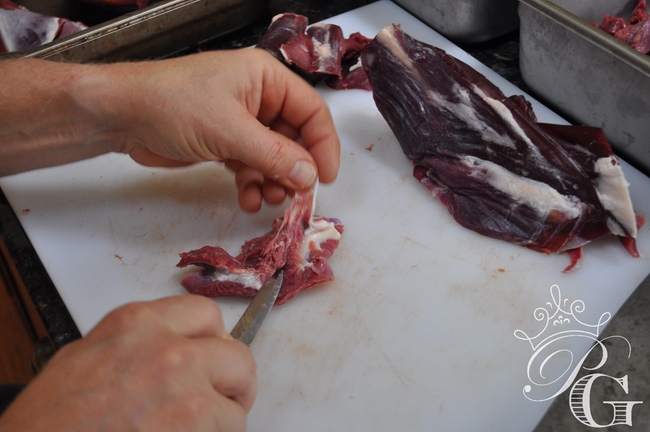
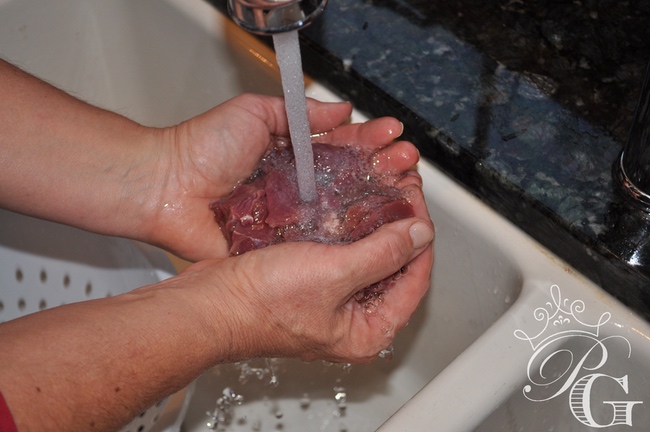
Preparation of the meat is the most labor intensive part. Trim away as much gristle, and fat as you desire from your raw, cool meat. Then, cut the meat into 1-inch cubes or strips. Once cut, rinse the meat in a strainer under cold water to remove any hair. Let it drain.
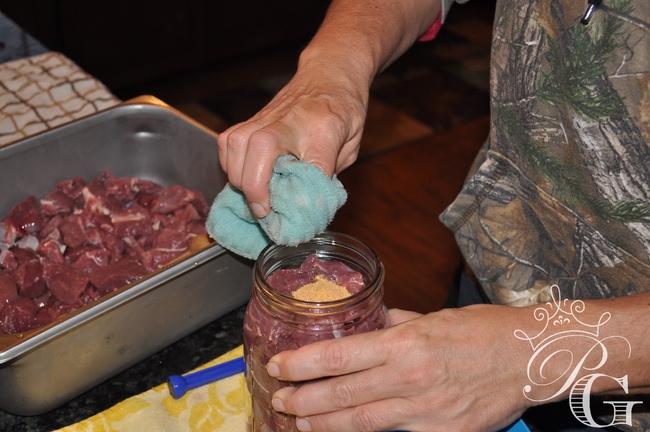
Now you can start filling the jars. Pack the prepared meat into those hot quart jars (remove them one at a time from your dishwasher) leaving a 1 inch headspace from the mouth. Occasionally you may notice a large empty pocket in the jar. Pack the meat down with the back of a wooden spoon or tart shaper to remove these excess air bubbles. Drop about 1/2 teaspoon of non iodized salt (to prevent clouding) and 1/2 teaspoon of Mrs. Dash (or any other seasoned salt) into the jar. DO NOT ADD ANY LIQUID.
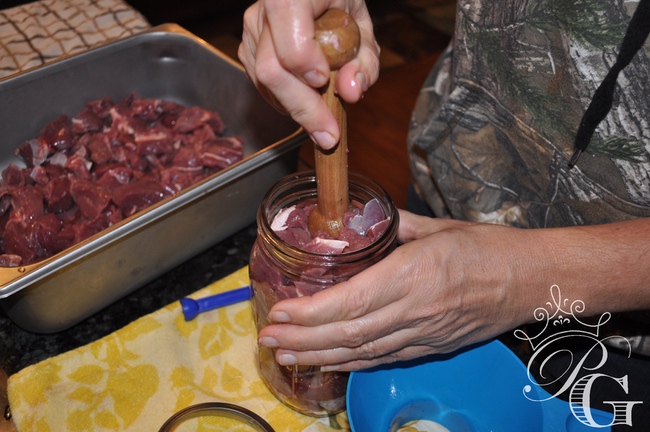
With the meat firmly packed inside, assemble the lid on the jar. Wipe around jar rim with a clean damp cloth, making sure there is no meat or grease that will interfere with a proper seal. Place a warmed lid on top and screw on the band, finger tight. Carefully place the jar inside a preheated pressure canner. Repeat this with the rest of your jars. Carefully make sure they don’t touch each other inside the canner.
Not to start the actual canning process. Follow the directions that came with your pressure canner and make sure not to miss a step.
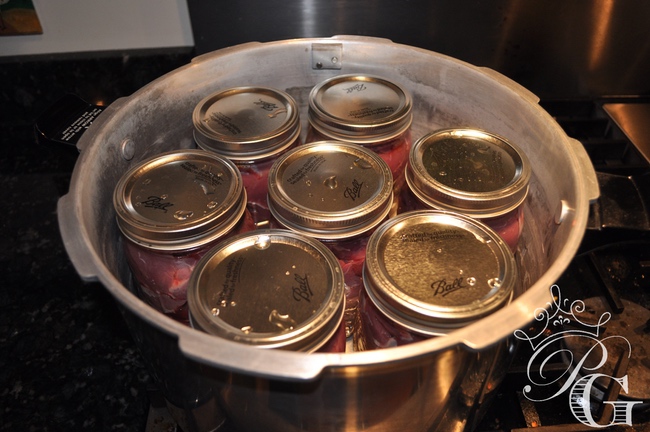
- Fasten the canner lid securely. Leave the pressure regulator off the vent pipe.
- Turn the heat setting on your stove to its highest position. Heat until the water boils and steam flows freely. While maintaining the high heat setting, let the steam vent continuously for 10 minutes.
- Put the pressure regulator on the vent pipe and wait for the canner to pressurize.
- Start timing the process when the pressure reading on the dial gauge indicates you’ve reached the recommended pressure.
- Regulate the heat under the canner to maintain a steady pressure at, or slightly above, the correct gauge pressure.
- It is extremely important to maintain a constant pressure with your canner. If the pressure starts to rise, lower the heat. Likewise, if it lowers, bring the heat back up. This is important for the safety of the food.
- When the timed process is complete, turn off the heat. Carefully lift the canner and remove it from the heat source. Let the canner cool down naturally.
- Once the pressure has returned to zero, remove the pressure regulator. Wait about 5 minutes, then carefully remove the lid.
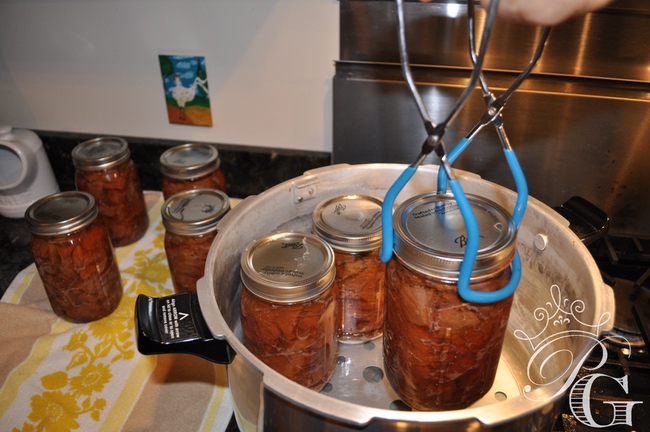
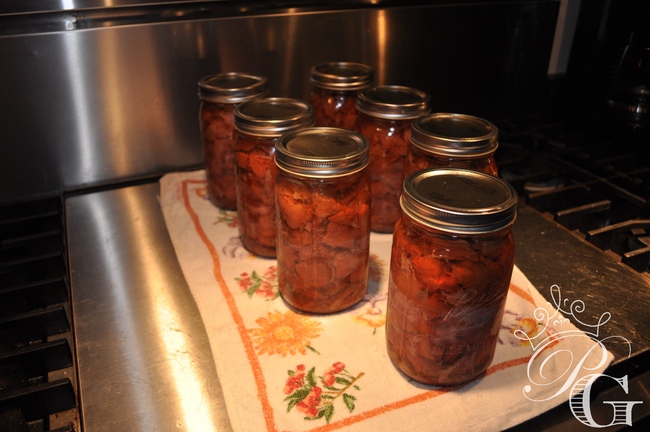
- Remove the jars one at a time, using a jar lifter, being cautious not to tilt them. Carefully place them directly onto a towel, leaving at least one inch of space between the jars during cooling.
- Do not disturb the jars while they cool, for at least 12 hours (I leave them over night). You will hear a popping sound as they cool and seal. Do not tighten ring bands on the lids or push down on the lid until the jars have completely cooled.
- After they have cooled, remove bands from sealed jars. They can be used again and this prevents them from rusting.
- Wash jars to remove any residue.
- Label jars and store in a cool, dry place, out of direct light.
I process my jars at 11 pounds of pressure for 90 minutes in Ohio. Check the chart that comes with your pressure canner and process according to your altitude.
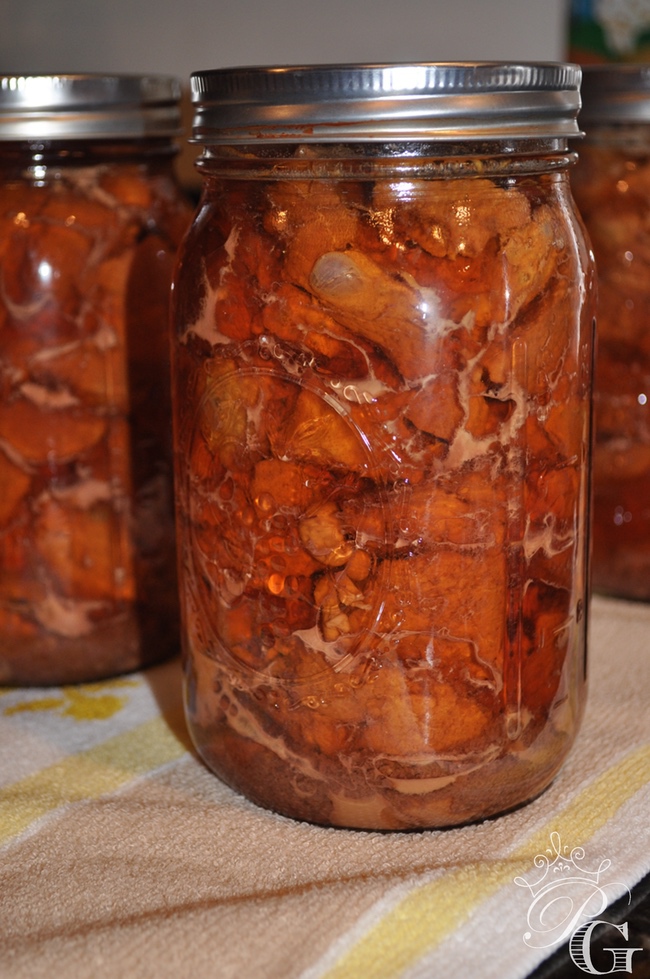
Voila! Now you have canned your venison. Rather than taking up space in the freezer, it can be stored on shelves in your pantry. When the meat is processed it mixes with the salt and seasoning and creates its own juices. Dinners will be as simple as opening one or two jars and heating it up.
Venison with Gravy
Ingredients: Canned venison, 2 tablespoons unsalted butter, 2 tablespoons flour.
Make a roux.
Melt 2 tablespoons of fat (I use unsalted butter).
Stir in 2 tablespoons of flour into the hot fat. Cook until browned.
While stirring slowly add the liquid from your jar. Bring to a simmer and continue stirring to avoid lumps.
Add your venison to the gravy. Heat until meat is warmed through. Sometimes I may add a little water if the gravy becomes too thick.
Serve over noodles, gnocchi or mashed potatoes.
My father-in-law always says that, “A recipe is only a guide for your imagination.” I am sure there are many other ways you can serve your canned venison. Hopefully someone in my family will tag a deer this year. I am looking forward to restocking my shelves and enjoying some easy to fix venison dinners. It’s a great feeling knowing that you won’t have to find room in the freezer to pack meat this year. Although I could probably throw out those sugary freezer pops that slid to the bottom.
10 Steps to Ensure Safe Pressure Canning
- Read all the instructions that came with your pressure canner prior to getting started.
- Check dial gauges for accuracy before use each year and replace if they read high by more than 1-2 pound pressure. Gauges can be checked at most county Cooperative Extension offices.
- Clean canner lid gaskets and apply a light coat a vegetable oil once a year. Nicked or dried gaskets should be replaced.
- Make sure all vent pipes are clear and contain no trapped material or mineral deposits.
- Center the canner over the level burner.
- Always stay nearby when pressure canning to monitor the pressure gauge.
- Be sure to follow the recipe’s headspace instructions. Too little headspace can cause food to escape over the rim and cause the jar not to seal.
- Vent all types of pressure canners 10 minutes before pressurizing.
- At the end of processing time, allow the pressure to drop to zero naturally and wait two to five minutes before opening the lid.
- Do not set processed jars on a cold surface or expose to breezy conditions as they can crack.
Try canning venison and save room in your freezer.
Have you ever smoked your venison? Check out my, “It’s Never too Late to Start Smoking … Meats that is.”